Wednesday, June 30, 2010

It's Not a School Night Mom

Here is our most recent dilemma, if you can call it that….I’m calling it that!

If you read the post about it, you know that Jack has gone back to pre-school part time. He goes three days a week.  Our general bed time routine involves reading two books in bed before tuck in. Jack has a way of dragging this out.  I have no idea how he manages to follow along with all the questions he ask through a book reading.  IMG_0093

When he started back to school, I decided to make it one book on school nights.  This has caused utter confusion in the little guys mind. I thought nothing of calling the night before school a “school night”.  He on the other hand points out to me that he didn’t have school that day, so it is NOT a school night. He thinks I’m tricking him, he actually says that…”your tricking me mom”!

So every “school night” I explain it again…him sitting in his bed with his arms crossed over his chest in a huff.  I’m thinking of making up a new name so as to avoid this time sucking routine.  I think I spend as much time explaining and RE explaining this concept, that I could have just gone ahead and read three books!

So I’m trying to come up with a new name to signify the need to get to bed in a timely fashion because you can’t sleep until 10 in the morning!  I’m drawing a blank….even as I sit here really focusing on it, I’m drawing a blank. I’m taking him to school now and will discuss it with him on the way and report back.

Back from dropping Jack at school. We discussed, he said “you decide”…*sigh*, so I ran a few past him and it looks like we’re settling on “early night” which isn’t catchy and isn’t what I was looking for.

I would love some input on this if anyone has a fresh idea. I’m all out of fresh! If you would, leave me your suggestions? Or…should I just stick with “school night” and wait for him to get it? After all, I never made up fake names for stuff for the others when they were young.

Tuesday, June 29, 2010

Pesto Chicken

I was stumped as to what to have for dinner tonight.   Earlier in the day I had taken a pork tenderloin out of the freezer for tomorrows dinner, but knowing I had waited too late in the day to take anything out for tonight, that we would have to have the stand-by chicken something or other…:/

So I start my googling.  I have some store bought pesto in the frig so I search for “pesto chicken” and find this, posted by Tish over at Recipe Zaar.  This is my usual way of finding last minute recipes if I go off the beaten path of regular fair.  So I skim through the recipe to make sure I have everything and off I go!  I put my famous frozen chicken tenderloins into the microwave and auto defrost for 5 minutes. I so love auto defrost and the fact that I can wait until 4:00 pm before deciding on what to have for dinner! This is super simple and fast!   My kind of dinner![/donotprint]

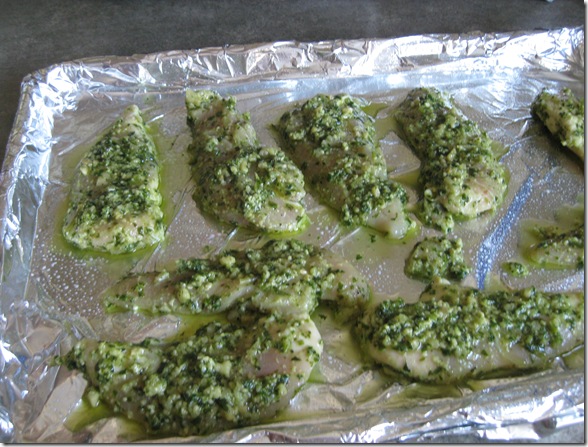
First you toss the chicken in the pesto and then arrange it on a foil lined cookie sheet. This goes into a preheated oven. The recipe called for an oven temp of 400.   I don’t know about your oven, but that is way too hot for mine and these little chicken tenderloins, so I set it at 350 or 325 for convection. I set the timer for 25 mins.

IMG_1143

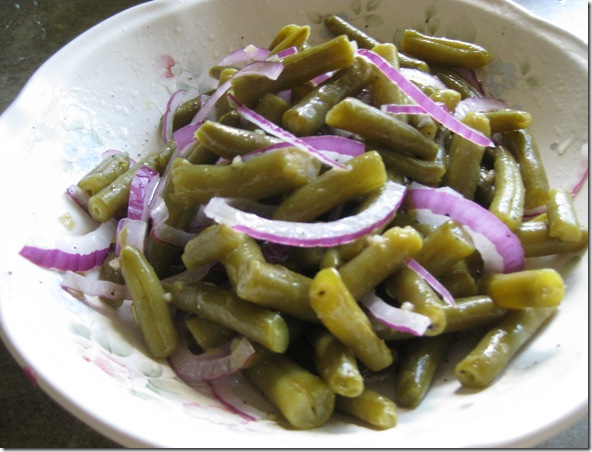
While the chicken was baking, I opened a can of green beans, sliced up some red onions very thinly and tossed it all together with olive oil and red wine vinegar, minced garlic, salt and pepper and then put that in the frig to chill a bit.

IMG_1148

Since this is a last minute, thrown together dinner, I reach to the pantry for store bought scalloped potatoes and make those according to the package directions. Once those are simmering the chicken is about done and ready for it’s next step. Take that out of the oven and put a slice of tomato on each piece of chicken.  I was actually lucky enough tonight to be able to go pick two small tomato’s from my shabby garden.  And no, shabby garden is nothing like “shabby chic”…but that’s a whole different post for a different time….

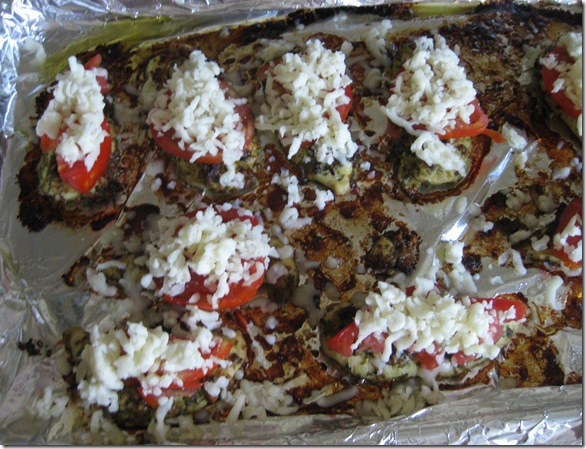
Anyway, next you put some shredded mozzarella on top of the tomato.   This is what these looked like when they came out of the oven. I’m very glad I thought to lower the temp.

IMG_1156

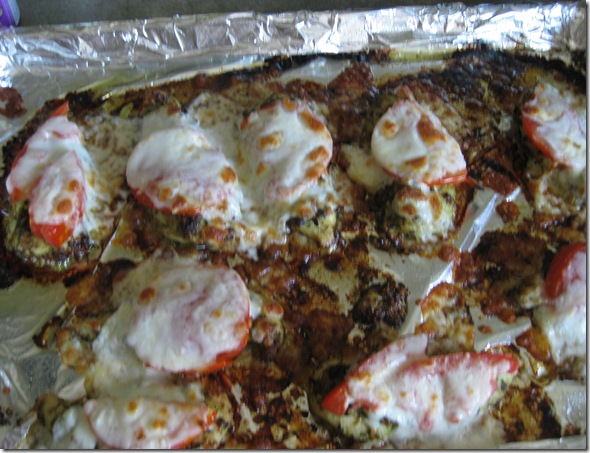
You now put them back in the oven and I diverted from the recipe here and put them under the broiler for about 3 mins, until the cheese started to brown a tad.

IMG_1159

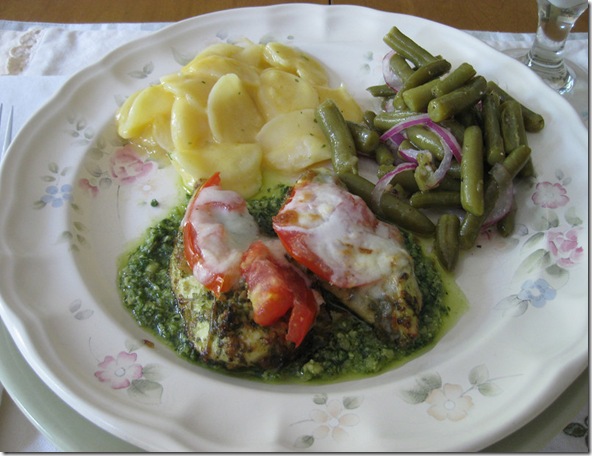
To plate the dish, I spread a good spoonful of pesto on the plate and then laid the chicken on it.

918075360_i5p2Z-L

Ok, so recipe….
Ingredients


  • 4 boneless skinless chicken breast halves

  • 1/2 cup refrigerated basil pesto

  • 2-3 plum tomatoes, sliced (optional)

  • 1/2 cup mozzarella cheese, shredded


Directions


  1. Preheat oven to 400 degrees F.

  2. Line baking sheet with heavy-duty foil.

  3. Place chicken and pesto in medium bowl; toss to coat.

  4. Place chicken on prepared baking sheet.

  5. Bake for 20-25 minutes or until chicken is no longer pink in center.

  6. Remove from oven; top with tomatoes and cheese.

  7. Bake for an additional 3-5 minutes or until cheese is melted.


My Notes: I used frozen boneless, skinless chicken tenderloins. I baked at 350 for 25 mins. and I sliced regular tomato’s to put on top.

Now, the reviews…;)

This recipe is missing a bit of something and it might be as simple as salting and peppering the chicken before tossing it with the pesto. I think home made pesto would be a zillion times better because it would be less oily. Mine was really oily and the dish was VERY rich for my taste. I also think it would be better with a more flavorful cheese. Maybe Fontina, which is what I think I will try it with next time.  It might also be really yummy to replace the tomato’s with roasted red peppers.

All in all it was an ok dinner. Jim ate two servings, Jack hardly ate dinner at all because he was eating on and off all day and I think he was just full, though he did eat all of his green beans. Sadly, my favorite tonight were the boxed scalloped potatoes! I’m so easy….:)

Btw....I never meant for this to become a cooking or recipe blog.  Lately it just seems that's about all I'm doing in my life.  I do love to cook, though I normally just create my own stuff without recipes much less measurements. (which isn't so easy to share)

I hope everyone is having a wonderful week and  that you're not involved in the stock market! And if you are my advice is to NOT look at your statements for a little while...;)[


Saturday, June 26, 2010

Another Saturday Night....What's for Dinner?

Yep, it's another Saturday night and we are home (as usual)!  It's very VERY hot here again with heat indexes over 100.  I just looked at my weatherbug and it's showing most of the county covered in this heat, so I guess we are all going through it together!

Ok, so on to dinner....I grilled tonight so as not to heat up the house.  Jim is trimming shrubs yet again, so just me grilling (be afraid....very afraid, though come to think of it, you're not eating this, so no worries).

No recipes tonight because you don't need any.  I took a whole chicken, rubbed him with house seasoning which is just salt, pepper and garlic powder and then stuck him on this little grilling gadget with an open can of Coke inside of him. ( we picked these up at Bass Pro Shop) It's even better with a can of beer, but Treeman drinks long necks so I didn't have any.  Though I guess I could have poured the coke out and filled it with beer from a bottle eh?  I digress...so back to the chicken....


While the chicken was cooking,  I tossed some asparagus spears and sliced red peppers with salt, pepper, minced garlic and balsamic vinegar and olive oil.   I threw these on the grill when the chicken was pretty much done.


While the veggies were grilling  I made up a simple salad of red leaf lettuce, tomato's, green onions, apples, walnuts and feta cheese. I then dressed it with Balsamic vinegar, and olive oil.  This is equally as yummy with blue cheese but feta is what I had on hand.


A bit over cooked on the outside, as usual when I grill, but its delicious all the same I promise! :)


Nice and simple!

Are you grilling this weekend?  I have a bunch of favorite outdoor cooking ideas I look forward to sharing with you over the summer and would love to hear if you have favorites as well!

Hope you're all having a wonderful, relaxing weekend!


Thursday, June 24, 2010

Who doesn't love S'mores? How about a brownie version....

I found the most unbelievable brownie recipe the other day at the Picky-Palate recipe blog!  She has the most wonderful recipes over there!  I'm not really big on serving desert or even sweets in general, (well...except chocolate... ) but MAN did these look to die for, and who doesn't love S'mores?  So this is what Jack and I made today...

First off, pre notes and disclosures: (because I'll always have these due to the fact that I always am missing ingredients  or the wrong size pan or I just screw up because I get into a rush.)

Right...disclosures...I used a 9x9 pan (because this is what I have) so we got more marshmallow yummyness browned by the oven.  It actually may have been a good thing because it caused them to taste "roasted".  We also stood our marshmallows "up" as opposed to them laying on their sides.   I blame this on Jack, who was helping me of course,  just because it's easy to blame a 5 year old for anything and everything.... but again, more roasted marshmallow this way.

I'll leave you with the recipe and some images, and will let you know that these are incredibly delicious and would be perfect to take to any summer outing that you are bringing a dish to. ps...the recipe is also very forgiving....;) I f you would like to see the original recipe and photos, just click on the link above!


Ingredients:

1 box of your favorite brownie mix

4 1/2 full Graham Crackers

3 1/2 Hershey Bars

16 large marshmallows

another note: if you use a 9x9 pan, you will need a couple more graham crackers and two more Hershey bars and about 20 marshmallows. Also, the tooth pick test didn't work for me.

Directions:

Preheat oven to 350.  Prepare brownie mix according to package directions.  Line foil into an 8x8 inch baking pan and spray generously with cooking spray.  Pour half of the brownie batter into lined pan.  Layer graham crackers over brownies following  with the Hershey bars and marshmallows.  Bake for 40-45 minutes or until toothpick comes out mostly clean from center.  Remove from oven and let cool completely.  Carefully remove foil and brownies from pan.  Peel any foil away from edges and cut into squares.


this is where I ran into a tad bit of trouble with using the larger pan.  I could have used a bit more batter...:/


That marshmallow puffiness settled down as they cooled.


Obviously....we did not wait for these to cool completely.   Again, Jack's fault....;)


Because he ( alright, "We")...couldn't wait to taste these baby's!


Hope you guys get a chance to try these!   Not only are they delicious, but super easy and fast as well!

If you've had these before or something like them,  I would love to hear about it!

~Sheree

Tuesday, June 22, 2010

What Everybody Ought to Know About Crafting

Crafting isn't easy.   It looks easy and it sounds easy, but it's really hard!    Another thing, blogging isn't easy.   Everyday, every post, I learn something that I did wrong.   Yesterday I made the mistake of declaring that I was going to decoupage this file box.  The mistake was not deciding to decoupage the box, the mistake was telling ~you~ that I was going to decoupage the box before I had even tried to do it!  Decoupaging is hard....don't children decoupage?  So before I show you my box (umm...cough)...I'm going to list the important things I learned NOT to do when decoupaging.  (editing to add; at least not as a beginner)

1. Do not use thick paper meant for scrapbook pages (no matter how much you love it)

2. Do not decoupage on curvy items with corners.

3. DO NOT decoupage on anything with a one piece hinged lid.

4. Do not let your dog have access to your paint brush.

5. Do not try to layer more thick paper over your mistakes.

I will say I am not totally hating my box, it is going to be just my box after all. I do think though that I might order some special paper and redo it at some point. I found this paper that I think is the same as the scrapbook page that I used. I think even the corners and hinged lid would have worked with thinner paper. Without further ado....my 3D index box! (yes, that's what I'm calling this project now. 3D Decoupage) It's ok to laugh....I'm laughing! :)

So you remember the before....


the beginning...(this part was fun..)


and the first few larger pieces were looking sweet....


but then I started noticing the layered look it was taking on....

I thought the layers of mod podge I was going to apply would level these out...lolololol


Anyway, don't laugh....finished project (actually, you can laugh. It's ok cause I can't hear you!)


Just kidding...but I did consider posting the pictures just like that!


All of the above pictures can be enlarged by clicking on them.   I just didn't want to freak anyone out that just happened by and I certainly didn't want to spend the time writing a badly done craft disclosure to post at the top of my blog.

As you can see  though,  all my little cards are back in place.  This is important so I don't forget to brush my teeth before I crawl in between the sheets tonight! ( that's a joke...sort of) ps...I think that's going to be my new tag line.

Speaking of sheets, it's time to go wash mine! (the little weekly card is telling me so)

Hope you're all enjoying your day! (it's one a kind)

Monday, June 21, 2010

Happy Midsummers Day!

Hope everyone is enjoying this Summer Solstice day! We had a crazy busy weekend with a family wedding Saturday night and of course Fathers day yesterday. So today I should be getting the house back in order...but no....I'm working on a little project. This project makes me feel 10 again...well maybe 13. It's hard to remember really the last time I decoupaged.

Said project involves this.....


and this....


Ya, I know! Exciting eh?  Bet you can't wait to see the outcome...right?

Ok seriously, remember when I ordered that spring cleaning index box and card system?  I promised to write about it but just have never gotten around to it.  It came and it was just adorable but really didn't meet my needs.  As a long time user of the "I survive with 3x5's" general system I guess I am somewhat set in my ways.  I know what works for me and what doesn't. First off I need space, I keep everything in there including a my whole address book!   I also need a slant so I can see right in there.  Slanted, tilted or laddered file boxes are not that easy to find, at least not the pretty ones.  So there in lies my project.  That picture above is the speckled index box I wrote of as being my first.  I loved the practicality of that box just not the looks, so that's my project.  I know....childlike, but it's been fun.  Messy but fun.

Alrighty then, back to the messy goo.  Pretty sure it's time for another layer of the stuff and really, I need to get all of my cards back in there so I know how to spend my days!  (that's a joke...sort of) *g*

Friday, June 18, 2010

Too hot to cook, so don't!

The St. Louis area is experiencing our first heat wave of the summer, all be it a bit early.  Treeguy (aka/dear husband) has to work out in it.  When he arrived home tonight I asked him what he wanted for dinner. He didn't want dinner, he had no appetite. I think the heat can do that to you when you're out in it all day.

He proceeded to take Jack swimming, leaving me to ponder what to make him that might be lighter than a full dinner and refreshing.   While I was pondering I was also catching up on some of the blogs I follow in google reader, when I came across Cristy's post on her blog "So Many Kids, So Much Fun". Really funny post about having watermelon and stove top stuffing for dinner while Dad was away.

Well, obviously Dad was not away so I couldn't get away with quite that but I did get away with this....:)


And this....


Scrumptious, light and refreshing, but most of all....cold! :)


The Caprese Salad was a last minute thought after I noticed a tomato I bought a couple of days ago was finally ripe and that I still had that whole milk Mozzarella in the frig from Danika's Baby Shower last month. It had an expiration date for next week so I needed to use it up. I tossed the sliced tomatoes with some store bought Pesto and then drizzled with Olive Oil and some Balsamic vinegar/salt and pepper, then just layered it with the sliced Mozz.  We pulled out the paper plates and snacked out in front of a movie in the Family Room. Oh, and darn it all.... I didn't have any watermelon in the house, which is what I really wanted! :)


Hope everyone is finding a way to stay cool and comfortable! Have a wonderful, relaxing weekend!


Wednesday, June 16, 2010

Free Senior Drink.... what the heck???

Today I had one of those moments in life that will forever be etched in my mind....  Like the first time I noticed I was no longer being carded at the grocery store, age 35.  The first time a bag boy at the grocery store asked "Ma'am, do you need help with your bags"? (also  35) Hmm....first grey hair, again 35.  Until I just typed that out, I had not remembered 35 being such a tumultuous year!

I decided that instead of watching the stock market all day, I would get some nagging errands run.  So I drop Jack at his summer pre-school program (I'm emphasizing summer program to reduce the guilt involved here) and I head off to Kohl's to pick him up some dress clothes and shoes for a wedding he is actually invited to this Saturday.  He is VERY excited  about being allowed at a wedding.  He danced all night at his big sisters wedding this past September (that's him to the right, I know...looks like he's imitating James Brown) and was devastated to learn soon after that children are seldom included in such festivities!  Anyway, I'm getting off course here....

So after a quick stop off at home, I head back out and decide to stop at Taco Bell since I've been craving a Steak Baja Chalupa (with guacamole) for what seems like weeks, and also so I will spend less money once I get into the grocery store.  I go to the counter, and order my Chalupa and ask for the very smallest size drink they have. I do this all the time if I go there, and several times in the past they have just given me the little cup for free. I always thought they were just being nice.  Today however, the "sweet" girl behind the counter says to me..."Oh, you get a free senior drink with that".   She then proceeded to give me my little blue cup, as I'm pretty sure my mouth had dropped.  Senior drink?  My mind was racing....I didn't recall her asking my age....Senior drink....OMG... really...she didn't actually just say that....

I sit down to eat....really no longer even wanting one sip of my free "senior" coke.  Instead I start texting.  First my daughter, then my husband, then one of  my internet friends.  Not even sure why I started texting.....but the next time someone starts spewing about how young I look....or says 51! Your 51 really? I'm going to tell them, yes REALLY.  Heck, I might even tell them I'm 55 or 60 then they really will think I look young for my years! LOL! (that's actually my sisters line)

So I finished my errands, receiving no more senior discounts for the remainder of the day and I then proceeded to pick up my 5 year old from pre-school (summer program that is, sort of like camp).  Isn't that ironic?

I did a quick search on google.  This was one of the decent search results I found at About.com.  And these are some of the results listed. The age for being considered a senior seems to run the  gamut between 50-65 yrs. with most falling around 55.  Banana Republic gives a 10% discount at age 50. I could maybe go for that one!  ;) 

Monday, June 14, 2010

Crunchy Granola

This is a great homemade granola recipe that we used at the Cafe'. What drew me to it originally was the fact that the only fat in it was naturally occurring from the walnuts. (no added oil)  It's delicious layered with fruit and yogurt, as a breakfast cereal with milk poured over it, (try zapping it in the microwave with milk for a nice hot cereal treat), or as a quick snack that even the kids will love!


Ingredients


  • 1 1/2 cups brown sugar

  • 1/2 cup water

  • 2 tsp. vanilla extract

  • 1 tsp. salt

  • 8 cups rolled oats

  • 2 cups chopped walnuts (or nut of your choice)


IMG_0971


Directions


Preheat oven to 275 degrees F.


Line 2 cookie sheets with parchment paper and set aside.


Combine brown sugar and water in a 4-cup microwave proof glass measuring cup or bowl. Place in microwave on high for 3/5 minutes (depending on your microwave) and cook until sugar is completely dissolved.  Remove from microwave, add vanilla extract and salt.


In a large mixing bowl, combine oats, nuts, and brown sugar syrup mixture. Stir until thoroughly mixed.  This is the part where Jacks little hands really come in handy....;)


Seriously, kids love to help make Granola!


IMG_0945


Spread the granola onto cookie sheets and bake 45 minutes to 1 hour or until golden and crunchy.


IMG_0950


IMG_0959


When the mixture comes out of the oven, it is still very pliable. You may choose to add in dried fruit as a finishing touch at this time. When granola has cooled completely, store in an airtight container.  We also divided much of this up into small lunch baggies for dh to grab and take with him to work in the mornings.  Makes 10 cups.


My Notes : You can also adjust your baking time to your desired crunchiness/color.


Recipe adapted from~ Kathleen Daelemans (food network)


Jack and I are going to experiment with this in the near future, maybe increasing the amount of syrup so we can shape these into a granola bar that we can dip in Chocolate!  Did I tell you Jack loves Chocolate just about as much as any woman I've ever come across?  :)


Saturday, June 12, 2010

Saturday Night, What's For Dinner?

This is what we had tonight…I love capers but I really wish I had some artichoke hearts in the pantry (note to self), that would have been even better!

Chicken Piccata (my way)

  • 10 Chicken Tenderloins ( I buy a massive bag of these from Costco)

  • Salt and Freshly ground pepper

  • All purpose flour for dredging

  • 1 egg plus a splash of water for dipping between dredging

  • 6 Tbs butter

  • 5 Tbs. Olive Oil

  • 1/3 cup fresh lemon juice (way less if you’re using other than fresh)

  • 1 cup chicken stock or broth

  • 1/4 cup brined capers, rinsed

  • 1/3 cup fresh parsley, chopped (if you only have dried, go ahead and add dry to the sauce while cooking)

  • optional: Artichoke hearts and/or White Wine


Directions:

Season chicken with salt and pepper. Dredge chicken in flour and shake off, then dip in egg and back into flour, again shaking off excess.

In a large skillet over medium high heat, melt 2 Tbs of butter with 3 Tbs of the olive oil.  When butter and oil start to sizzle, add the chicken one piece at a time.  I usually do my dredging and dipping as I’m putting them in the pan.  Depending on the size of your pan, you may have to do this in two batches. ( I have a really big pan because I hate to have to do it in two batches)

Cook for about 3 minutes and when browned, flip them and cook the other side for 3/5 minutes.  When they are cooked go ahead and move them to a plate and remove the pan from the heat.

Now add the lemon juice, chicken stock/broth and capers.  This is about the time I add either a little flour or cornstarch to some reserved stock or plain water and add to the pan to thicken it up,  but only because I like my sauce pretty thick.  This along with the strength of the lemon can be adjusted according to your own likes.  Now return all the chicken to the pan and simmer for 5 minutes.  Remove chicken to platter, add remaining 2 Tbs. of butter to sauce and stir or whisk until smooth.  The above recipe should give you enough sauce, but if you like extra (like we do) you can always double it up!


Scalloped Potato Gratin

  • 1 1/2 cups heavy cream

  • 4 sprigs of fresh thyme

  • 2 garlic cloves, chopped

  • Butter

  • 2 lbs. white potatoes, peeled and sliced into 1/8 inch thick slices

  • salt and pepper

  • 1/2 cup grated Parmesan, plus more for broiling during the last 5 min.


Directions:

Preheat oven to 375 degrees

In a pan, heat up the cream with the sprigs of thyme and chopped garlic.  While the cream is heating up, butter a casserole dish.  Once the cream is heated, add the parmesan and salt and pepper to taste then mix.  Next add the sliced potatoes to the cream mixture, just stirring them around to coat them with the sauce.  Pour into your buttered casserole dish, spreading them out evenly as you pour.  Cover with foil and bake covered for 1 to 1 1/2 hours.  Not sure why, but some potatoes just seem to take more time to cook, so start checking them around the 45 minute point.  When desired doneness is reached, remove foil and add more cheese on top and bake or (broil if desired) uncovered for an additional 5 minutes.

Note: You may also layer in other cheeses as you’re adding the potato slices to your baking dish. Makes 4-6 servings.


Hope everyone is having a relaxing weekend and finding a way to stay cool!  Heat index around 102 here today....and to think, it's only June!